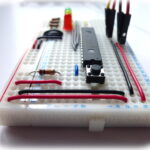
 In How To Use A MCP23017 I2C Port Expander With The Raspberry Pi – Part 2 I explained how to use an MCP23017 16-bit port expander to provide additional outputs. In this article I’ll show a basic input example where we read the status of a push switch.
In our example circuit the switch input uses the last bit of the GPA set of pins.
Python Script For Inputs
Here is an example script which will read the status of the switch in a loop and print message when it is pressed :
import smbus
import time

#bus = smbus.SMBus(0)  # Rev 1 Pi uses 0
bus = smbus.SMBus(1) # Rev 2 Pi uses 1

DEVICE = 0x20 # Device address (A0-A2)
IODIRA = 0x00 # Pin direction register
GPIOA  = 0x12 # Register for inputs

# Set first 7 GPA pins as outputs and
# last one as input.
bus.write_byte_data(DEVICE,IODIRA,0x80)

# Loop until user presses CTRL-C
while True:

  # Read state of GPIOA register
  MySwitch = bus.read_byte_data(DEVICE,GPIOA)

  if MySwitch & 0b10000000 == 0b10000000:
   print "Switch was pressed!"
   time.sleep(1)
You can download direct to your Pi using :
wget https://bitbucket.org/MattHawkinsUK/rpispy-misc/raw/master/mcp23017/mcp23017_inputs.py
You can run the script using the following command :
sudo python mcp23017_inputs.py
The script above performs the following actions :
- Imports the smbus and time libraries
- Creates an smbus object named “bus”
- Configures some register address constants
- Sets first 7 GPA pins as outputs
- Sets last GPA pin as an input
- Reads the state of the 8th bit and prints a message if it goes high
When you press the button you should see “Switch was pressed!” printed to the screen.
In this example we only used one switch. Using both 8 bit registers (GPA and GPB) you’ve got a total of 16 pins to configure as inputs or outputs. That’s a possible 16 LEDs or switches in whatever combination you like. You just need to configure the IODIRA and IODIRB registers with the correct bit pattern.
Don’t forget to check out the online binary, hexadecimal, decimal number convertor to quickly generate binary, decimal and hexadecimal numbers for your own I2C scripts.


